
Azure File Sync | 4. Storage Sync Service einrichten
- Thomas Schmid
- 16. Juli 2023
- 1 Min. Lesezeit
Aktualisiert: 21. Juli 2024

In die Ressourcen Gruppe wechseln
Fenster "Godangel - Microsoft Azure"
Menü "Overview"
+ Create >

Fenster "Marketplace - Microsoft Azure"
Eingabe Suchfeld file >
Azure File Sync >

Abschnitt "Azure File Sync"
Create >
Azure File Sync >

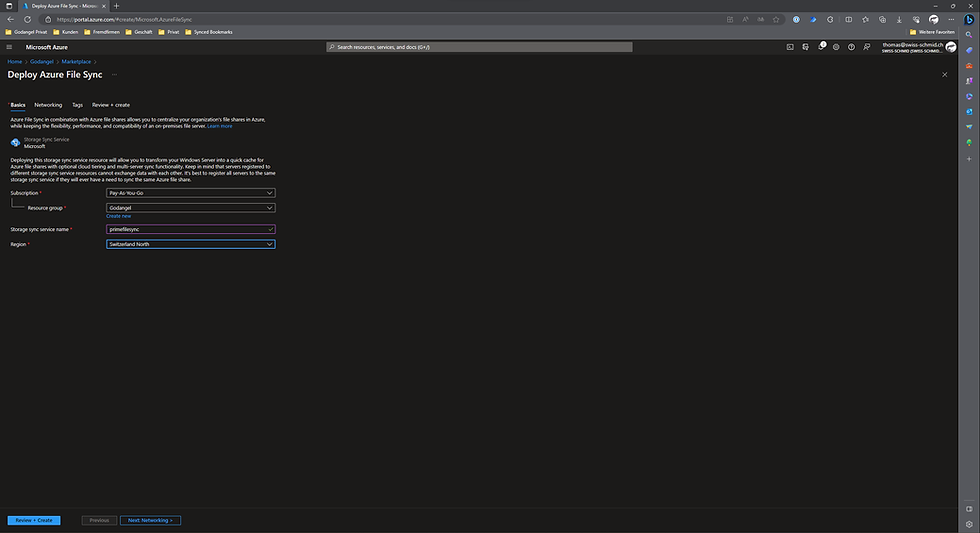
Fenster "Deploy Azure File Sync - Microsoft Azure | Deploy Azure File Sync"
Register "Basics"
Auswahl Subscription Pay-As-You-Go >
Auswahl Resource group Godangel >
Eingabe Storage sync service name primefilesync
Auswahl Region Switzerland North >
Next : Networking >
❗Wichtig: Der Azure File Sync und der zu synchronisierende Storage Account müssen in der gleichen Region bereitgestellt werden. Sonst können sie nicht gemeinsam funktionieren.
Fenster "Deploy Azure File Sync - Microsoft Azure | Deploy Azure File Sync"
Register "Networking"
Allow access from
[x] All networks
Next : Tags >

Fenster "Deploy Azure File Sync - Microsoft Azure | Deploy Azure File Sync"
Register "Tags"
Next: Review + create >

Fenster "Deploy Azure File Sync - Microsoft Azure | Deploy Azure File Sync"
Register "Review + create"
Create >

🕐Deployment is in progress…

Deployment fertig gestellt.
Fenster "Microsoft.StorageSync-…."
Go to resource >


Comments